How to Launch a Startup Brand for Under $25 a Month: Part 1 - Initial Setup

TL;DR. You can stand up a real, AI-citable brand foundation - a domain, a fast website, and a blog - for about $25 a month plus a once-a-year domain. The recurring stack is small and deliberate: GitHub Team for a private repo ($4/user/month), Claude Pro to run Claude Code as your AI builder ($20/month), and Cloudflare - DNS, SSL, CDN, and Pages hosting - for free. The barrier to launching a brand that ChatGPT, Perplexity, and Google's AI Overviews actually cite is not budget. It is doing the steps in the right order so answer engines can find, understand, and trust you from day one. This is Part 1 of a three-part series. Before you start, run a free Brand Analyzer scan on a competitor's domain - that score is the target you are building toward.
What it costs, and why most launch guides get it wrong
Most "how to start a company" guides quietly assume a sprawling budget: a logo designer, a website builder subscription, an email tool, a paid SEO suite. Stacked up, the "minimal" startup costs hundreds of dollars a month before you have a single customer. That advice is also a generation out of date, because it optimizes for the wrong discovery channel.
A growing share of your first buyers will not find you through a ranked list of blue links. They will ask ChatGPT, Claude, Perplexity, or Google's AI Overviews a question - "what is the best tool for X" - and act on the answer. That shift has two names worth knowing. Generative Engine Optimization (GEO) is the practice of becoming a source the model trusts enough to name and cite inside its answer. Answer Engine Optimization (AEO) is the closely related craft of structuring your content as clean, self-contained answers a model can lift directly. SEO optimizes ranked links; GEO and AEO optimize the answer itself.
The good news: the foundation for being citable is mostly technical, not expensive. A canonical domain, fast HTTPS pages, structured data, an llms.txt file, a clean heading hierarchy - these cost almost nothing to ship. The whole recurring stack in this guide is two small subscriptions and a domain, roughly $25 a month. That is not "free," but it is a fraction of the traditional stack, and every dollar buys leverage: a private repo you actually own, and an AI agent that builds and maintains the site for you. This series fixes the order. We build the entire on-site foundation in Part 1, then add measurement and earned citations in Parts 2 and 3. To understand why these specific signals matter, read our companion guide on why your brand isn't mentioned in ChatGPT - this stack is built directly around the 7-Signal AI Visibility Framework it describes.
The running cost tracker
We keep an honest tally throughout the series. The rule: we count the real recurring price of the lean stack we recommend, and we flag everywhere you can pay less - a free GitHub plan if you are truly solo, or a Claude subscription you may already own. Here is where Part 1 lands:
| Step | Item | Cost (USD) | Recurring? |
|---|---|---|---|
| 1 | Domain registration | $10-15/yr | Yearly |
| 1 | Cloudflare account, DNS + Pages (free plan) | $0 | - |
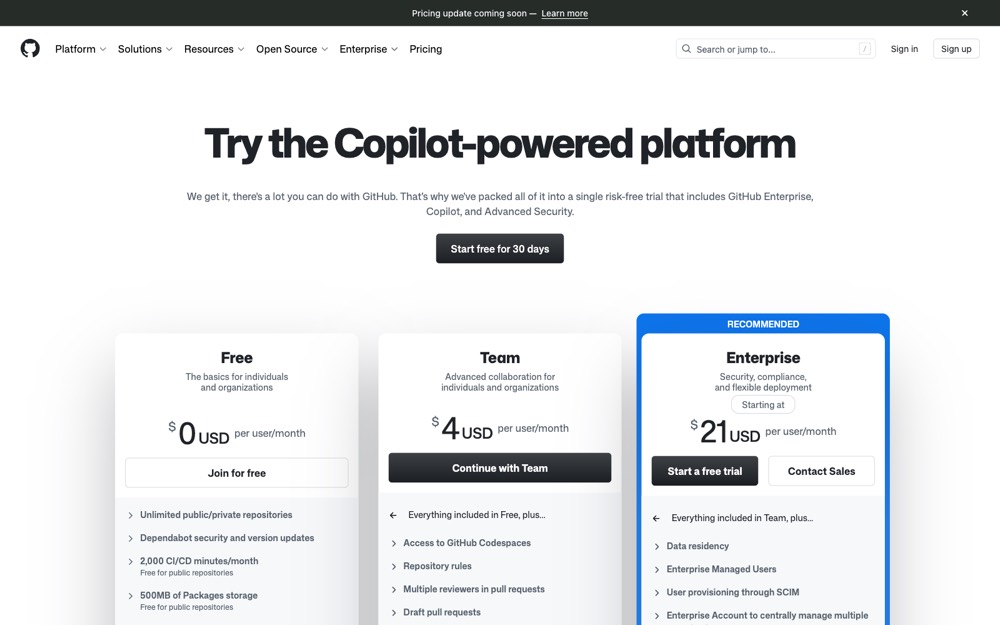
| 2 | GitHub Team (private repo + collaboration) | $4/user/mo | Monthly |
| 3 | Claude Pro + Claude Code (AI builder) | $20/mo | Monthly |
| Running total after Part 1 | ~$25/mo + domain | ||
Two notes on keeping it honest. If you are a solo founder who does not need branch protection and shared org settings, GitHub's Free plan includes unlimited private repositories at $0 - we recommend Team because a real company wants the collaboration controls. And if you already pay for Claude, the AI line is a sunk cost, so your added spend to launch is just the $4 GitHub plan and the domain. The directory submissions and analytics setup that round out an AI-visible brand are free, and they live in Part 2.
Step 1: Get a domain and put it on Cloudflare (~$10-15/yr)
What it is: One domain name, with its DNS, SSL certificate, and CDN handled by Cloudflare's free plan. This is your brand's most important asset and the only yearly line on the tracker.
Why it matters for GEO: Your domain is your brand's canonical entity anchor. AI answer engines disambiguate companies by a single consistent domain plus the sameAs links pointing back to it from your social and directory profiles. One clean domain, used identically everywhere, is the spine of entity recognition - it is how a model knows the LinkedIn page, the directory listing, and the product are all the same company. Cloudflare's free plan also gives you fast, HTTPS-served pages from a global edge network, and page speed is a real quality signal for both classic search and AI retrieval.
How to do it - two paths, the same destination: First, create a free Cloudflare account at dash.cloudflare.com. Then take whichever path applies to the name you want.
Primary path - register directly on Cloudflare. Open Cloudflare Registrar and search for your domain. Cloudflare sells domains at cost - no markup over the wholesale price set by the registry and ICANN, and no upsells. If the name and extension you want are available there, buy it. Your DNS is now on Cloudflare automatically.
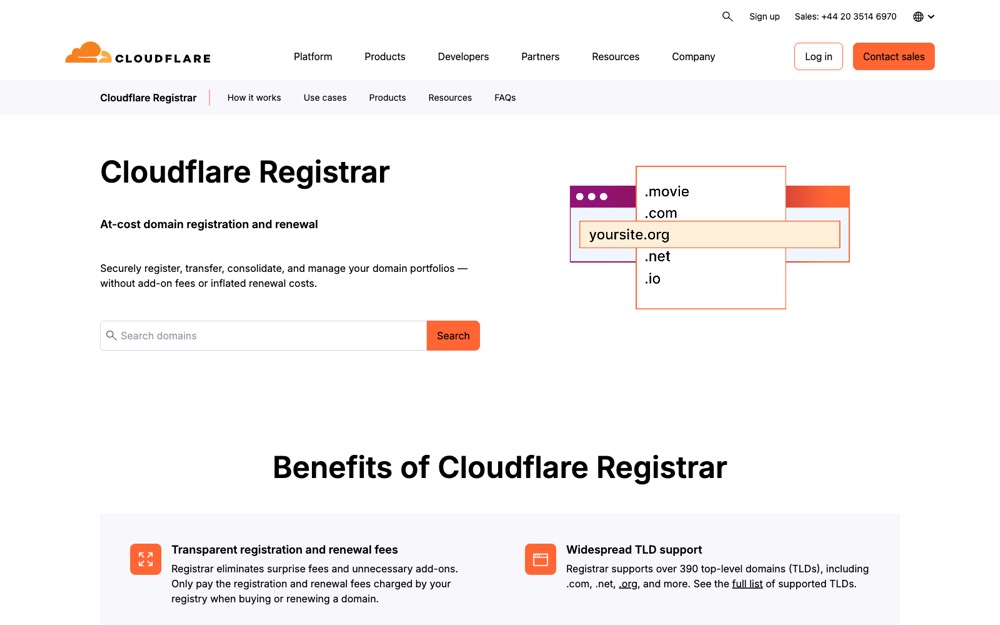
Fallback path - register elsewhere, then add to Cloudflare. Direct registration support varies by extension, so if your name is not available there, use a low-cost registrar like Porkbun or Namecheap (roughly $10 the first year). Then in Cloudflare choose "Add a site," pick the free plan, and copy the two Cloudflare nameservers into your registrar's DNS settings. Within minutes to a few hours your domain is live on Cloudflare's free plan - identical to the primary path. The only difference is which company sends your renewal invoice.
One naming note that is pure GEO: pick a name that is unambiguous and easy to spell. AI assistants routinely confuse similarly named brands, and a name that collides with an existing company or a common phrase makes entity disambiguation harder for the rest of your life. A distinctive, spellable name is a free head start.
Cost: the domain, $10-15/yr; Cloudflare, $0. Running so far: ~$10-15/year (just the domain).
Step 2: Create a private GitHub repo for your site and blog
What it is: A GitHub organization that owns your code, and one private repository inside it that holds your marketing website and blog. This is where Claude Code will build your site in Step 3, and what Cloudflare Pages will deploy from.
Why an organization, and why Team: Create an organization rather than building under your personal account. An org gives the brand clean ownership and lets you add a co-founder, contractor, or freelance developer later without exposing your personal account. GitHub's Team plan is $4 per user per month and adds the collaboration controls a real company wants - protected branches, code owners, required reviews, and org-wide settings. (If you are genuinely solo and do not need those yet, GitHub's Free plan includes unlimited private repositories at $0; you can upgrade to Team the day you add a second person.)
How a private repo becomes a live public site - the part everyone wonders about: Cloudflare Pages connects to your private repository through an authorized GitHub App. On every push, Cloudflare pulls your code, runs your build, and serves only the generated output - the finished HTML, CSS, and images - to the public on your domain. Visitors see the built site; they never see the repository. Your source stays completely private while the live website is fully public. This is the standard way modern static sites are deployed, and it is what lets a private repo power a public brand at zero hosting cost.
How to do it:
- In GitHub, click your profile menu and choose Your organizations → New organization. Pick the Team plan, name the org after your brand, and add yourself (and any co-founders).
- Inside the org, click New repository. Name it something like
website, set visibility to Private, and initialize it with a README so the repo isn't empty. - Clone it locally (
git clone) so Claude Code can work inside it in Step 3 - or, if you prefer, point your AI agent at the repo directly. - Leave the wiring to Cloudflare for the end of Step 3, once there is a site to deploy. You will connect the repo there in three clicks.
While the agent scaffolds your site in the next step, this is also the moment to generate the logo, colors, and brand kit it will use - you can do that for free, which we cover in brand identity on a budget.
Cost: GitHub Team, $4/user/month. Running so far: ~$4/month + the domain.
Step 3: Build the site with an AI agent, then deploy it on Cloudflare Pages
What it is: A single, detailed, copy-paste prompt you hand to an AI coding agent to scaffold a complete, GEO/AEO-optimized static website and blog - then a three-click deploy that connects your private repo to Cloudflare Pages and pushes it live on your domain.
Which agent we recommend: Claude Pro ($20/month) running Claude Code. Claude Code is the agent that works directly inside your repository from the command line - it reads your files, writes the whole project, and commits the result. The prompt below is tool-agnostic, so GitHub Copilot or Cursor will also work; we recommend Claude Code because operating on the entire repo at once is the smoothest path for this kind of greenfield build. Point it at the repo from Step 2, paste the prompt, and fill in the bracketed placeholders once.
Why it matters for GEO and AEO: The prompt bakes the entire on-site half of AI visibility into the scaffold on day one instead of leaving it to be retrofitted. Schema.org structured data, an llms.txt file, a clean semantic heading hierarchy, answer-first FAQ blocks, a sitemap, and fast Core Web Vitals are all requirements, not afterthoughts. The result is a site that answer engines can crawl, parse, and quote with confidence.
The prompt - copy everything between the lines:
You are a senior front-end engineer building a fast, accessible, GEO/AEO-optimized
static marketing website and blog for a startup. Generate the COMPLETE project in
this repository. Optimize every decision for two goals: (1) being cited by AI answer
engines (ChatGPT, Perplexity, Claude, Google AI Overviews), and (2) excellent Core
Web Vitals. Do not add heavy frameworks.

=== FILL THESE IN FIRST ===
- [BRAND]            = brand / company name
- [DOMAIN]           = canonical domain, e.g. example.com (no trailing slash)
- [ONE_LINER]        = one-sentence description of what the company does
- [CATEGORY]         = the product category (e.g. "AI invoicing for freelancers")
- [TWITTER_HANDLE]   = @handle (or leave blank)
- [LINKEDIN_URL]     = company LinkedIn URL (or leave blank)
- [GITHUB_URL]       = company GitHub org URL (or leave blank)
Use https://[DOMAIN] as the absolute base for every canonical, OG, sitemap, and
JSON-LD URL. Where a value is unknown, insert a clearly-marked TODO comment.

=== TECH CONSTRAINTS ===
- Static site, built with a lightweight static generator (default: Eleventy/11ty;
  Astro acceptable) so the blog index, sitemap, and llms.txt AUTO-REGENERATE on build
  (Requirements 5, 7, 10). Justify the choice in README. Plain hand-written HTML/CSS is
  allowed ONLY as a fallback when no generator is wanted - in that case the
  auto-regeneration promises do not apply and the README must say so. No React/Vue SPA,
  no client-side routing, no heavy runtime JS.
- Output must build to a /dist directory (or be servable from repo root) suitable for
  Cloudflare Pages.
- Plain CSS or a tiny utility layer. No CSS framework that ships large bundles.
- All JS must be deferred or omitted. Zero render-blocking resources.

=== REQUIREMENT 1: SEMANTIC, ACCESSIBLE HTML5 ===
- Use <header>, <nav>, <main>, <article>, <section>, <footer>, <figure>.
- Exactly one <h1> per page; logical, non-skipping heading order (h1 > h2 > h3).
- All images have descriptive alt text; decorative images alt="".
- Color contrast >= WCAG AA; visible :focus styles; skip-to-content link; lang="en"
  on <html>; ARIA only where semantics are insufficient.

=== REQUIREMENT 2: STATIC BUILD FOR CLOUDFLARE PAGES ===
- Build command and output directory documented in README (e.g. build command
  "npm run build", output "dist"; or "none" + output "." for hand-written HTML).
- No server-side runtime. Everything is static files after build.

=== REQUIREMENT 3: PER-PAGE HEAD TAGS (templated, never duplicated) ===
Every page must set, from per-page front matter / variables:
- <title> (unique, <= 60 chars)
- <meta name="description"> (unique, <= 155 chars)
- <link rel="canonical" href="https://[DOMAIN]/PATH/">
- Open Graph: og:title, og:description, og:type, og:url, og:image, og:site_name
- Twitter: twitter:card=summary_large_image, twitter:title, twitter:description,
  twitter:image
- <meta name="viewport" content="width=device-width, initial-scale=1.0">
Centralize these in a base layout so a new page only supplies its own values.

=== REQUIREMENT 4: JSON-LD STRUCTURED DATA (schema.org) ===
Inject valid JSON-LD via <script type="application/ld+json">. Validate against
Google Rich Results Test mentally before emitting.
- HOMEPAGE: Organization (name, url=https://[DOMAIN], logo, description,
  sameAs: [ [LINKEDIN_URL], https://x.com/[TWITTER_HANDLE], [GITHUB_URL] ]) AND
  WebSite (name, url, potentialAction SearchAction if search exists).
- EVERY BLOG POST: Article (headline, description, datePublished, dateModified,
  author as Organization, publisher as Organization with logo, image, mainEntityOfPage)
  + BreadcrumbList (Home > Blog > Post).
- ANY PAGE WITH A Q&A SECTION: FAQPage whose mainEntity Question/acceptedAnswer
  pairs EXACTLY mirror the visible on-page FAQ text. Answers must be valid JSON
  strings: no unescaped double quotes inside answer text.

=== REQUIREMENT 5: HAND-MAINTAINABLE BLOG + STARTER POST ===
- A /blog/ index listing posts newest-first, and individual post pages at /blog/SLUG/.
- Author one complete starter post titled along the lines of
  "What is [CATEGORY]? A practical guide" - 600-900 words, real H2/H3 structure,
  and a 3-4 question FAQ section (so the FAQPage schema has content).
- Adding a post = create one Markdown/HTML file in content/ (see Requirement 10);
  no code changes required.

=== REQUIREMENT 6: llms.txt AT SITE ROOT (GEO) ===
- Generate /llms.txt served at https://[DOMAIN]/llms.txt.
- Markdown format: an H1 with [BRAND], a one-line ">" blockquote summary using
  [ONE_LINER], a "## Core resources" list of key page URLs with one-line
  descriptions, a "## Blog" list, and a "## Canonical brand description" paragraph.
- PURPOSE COMMENT in README: llms.txt is the AI-era robots.txt - it gives LLM
  crawlers (OpenAI, Perplexity, Anthropic) a curated, machine-readable map of the
  site and a canonical description, raising the odds the model cites the brand
  accurately. Keep it 150-600 words.

=== REQUIREMENT 7: sitemap.xml + robots.txt ===
- /sitemap.xml listing every public URL with absolute https://[DOMAIN]/ paths and
  <lastmod>. Regenerate on build.
- /robots.txt that ALLOWS major crawlers AND AI crawlers (GPTBot, ClaudeBot,
  PerplexityBot, Google-Extended), and points to the sitemap:
  "Sitemap: https://[DOMAIN]/sitemap.xml".

=== REQUIREMENT 8: HEADING HIERARCHY + AEO FAQ BLOCKS ===
- Front-load a direct one-paragraph answer near the top of each key page
  (answer-first / TL;DR style) so answer engines can lift it.
- Use real question-phrased H2/H3s and concise, self-contained answers.
- Every FAQ block has a matching FAQPage JSON-LD entry (Requirement 4).

=== REQUIREMENT 9: CORE WEB VITALS / PERFORMANCE ===
- loading="lazy" + explicit width/height on all non-hero images (prevent CLS).
- Responsive images via srcset/sizes; prefer modern formats (WebP/AVIF) with
  fallback.
- Inline critical CSS or preload the stylesheet; defer all scripts.
- System font stack or one preloaded, subsetted web font. No layout-shifting
  third-party embeds. Target Lighthouse >= 95 on mobile.

=== REQUIREMENT 10: content/ STRUCTURE FOR NON-ENGINEERS ===
- A /content/ directory holding posts as Markdown with simple front matter:
  title, description, date, slug, image, and an optional faq: list of {q, a}.
- README section "How to publish a post" with copy-paste steps a non-engineer
  follows: duplicate a sample file, edit front matter + body, commit/push - the
  build regenerates blog index, sitemap, and llms.txt automatically.

=== REQUIREMENT 11: CLOUDFLARE PAGES DEPLOY (from a PRIVATE repo) ===
Add a README "Deploy" section documenting:
1. In Cloudflare Pages, "Connect to Git" and authorize the Cloudflare GitHub App
   for the PRIVATE repository (Cloudflare builds it; only the built /dist output
   is served publicly, so the source stays private).
2. Set Build command and Output directory to match this project's build.
3. Add the custom domain [DOMAIN] in Pages > Custom domains (DNS already on
   Cloudflare from Step 1).
4. Confirm https://[DOMAIN]/llms.txt, /sitemap.xml, and /robots.txt resolve after
   the first deploy.

=== DELIVERABLES ===
1. Full project tree (layouts, content/, assets, config).
2. A working homepage, a /blog/ index, and one starter post - all with correct
   per-page meta + JSON-LD.
3. llms.txt, sitemap.xml, robots.txt.
4. A README covering: chosen generator + why, local dev, build command + output
   dir, "How to publish a post", and the Cloudflare Pages deploy steps above.
Before finishing, self-check each of Requirements 1-11 and list any TODOs you left.
Deploy it on Cloudflare Pages (connect the private repo): When the agent finishes, commit and push. Then:
- In the Cloudflare dashboard, open Workers & Pages → Create → Pages → Connect to Git.
- Authorize the Cloudflare GitHub App and grant it access to your private repository. Cloudflare builds the repo; only the built output is served publicly, so the source stays private.
- Set the Build command and Output directory to match the README the agent wrote (for example,
npm run buildanddist). - After the first deploy, open Custom domains and add your domain. Because DNS is already on Cloudflare from Step 1, this is a one-click attach with automatic SSL.
- Confirm
yourdomain.com/llms.txt,/sitemap.xml, and/robots.txtall resolve. Every futuregit pushnow redeploys automatically.
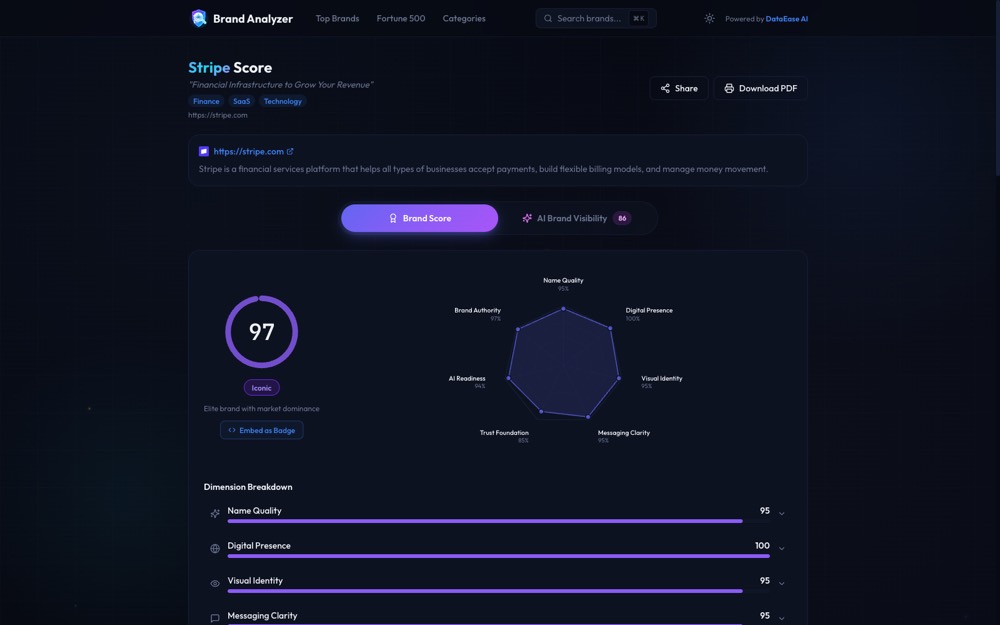
Cost: Claude Pro, $20/month; Cloudflare Pages, $0. Running total: ~$25/month + the domain. Site live? Run a free Brand Analyzer scan on your own new domain to confirm the schema and llms.txt are detected, and capture your day-one baseline score.
What you have after Part 1 (the running total)
For two small subscriptions and a domain, you have built the entire on-site half of AI visibility:
- A canonical domain on Cloudflare's free plan, with fast HTTPS pages served from a global edge.
- A private GitHub organization and repository, deploying publicly through Cloudflare Pages.
- A GEO/AEO-optimized static website and blog - semantic HTML, schema.org markup,
llms.txt, a sitemap, answer-first FAQ blocks, and a starter post - built by an AI agent and redeployed on every push.
| Step | Item | Cost (USD) | Recurring? |
|---|---|---|---|
| 1 | Domain registration | $10-15/yr | Yearly |
| 1 | Cloudflare account, DNS + Pages (free plan) | $0 | - |
| 2 | GitHub Team (private repo + collaboration) | $4/user/mo | Monthly |
| 3 | Claude Pro + Claude Code (AI builder) | $20/mo | Monthly |
| Running total after Part 1 | ~$25/mo + domain | ||
That is the full on-site foundation, done in the right order, for about $25 a month. Re-run Brand Analyzer and screenshot your score - it is the baseline you will measure Parts 2 and 3 against.
Frequently asked questions
How much does it really cost to launch a startup website this way?
About 25 dollars a month, plus a domain. The recurring stack is GitHub Team at 4 dollars per user per month, which gives you a private repository with real collaboration features, and Claude Pro at 20 dollars a month to run Claude Code as your AI builder. On top of that you pay once a year for the domain, around 10 to 15 dollars. Cloudflare handles DNS, SSL, CDN, and Pages hosting for free. If you already subscribe to Claude, your added cost drops to just the 4 dollar GitHub plan and the domain.
Can I register a brand-new domain directly with Cloudflare?
Often, yes. Cloudflare Registrar sells domains at cost with no markup, and it now supports registering many brand-new names directly. Support varies by extension, so this guide is built to work either way. If Cloudflare can register the name you want, do that and your DNS is already set up. If it cannot, register the domain at a low-cost registrar like Porkbun or Namecheap for around 10 dollars, then add the domain to Cloudflare on the free plan and point your nameservers at Cloudflare. Both paths end in the same place: your domain on Cloudflare's free plan.
How can a private GitHub repository power a public website?
Cloudflare Pages connects to your private repository through an authorized GitHub App, pulls your code on every push, builds the site, and serves only the generated output to the public on your domain. Visitors see the finished pages; they never see your repository, your drafts, or your configuration. Your source stays completely private while the live website is fully public - this is the standard way modern static sites are deployed.
Which AI coding agent should I use to build the site?
We recommend Claude Pro at 20 dollars a month with Claude Code, the agent that works directly inside your repository from the command line. The build prompt below is tool-agnostic, so GitHub Copilot or Cursor work too, but Claude Code's ability to read and edit your whole repo makes it the smoothest path for this project. Whichever you pick, the output is the same: a fast, static, GEO-optimized site with schema markup, an llms.txt file, a sitemap, and a starter blog post, ready to deploy on Cloudflare Pages.
What is llms.txt and why does my new site need one?
llms.txt is a plain-text file at your domain root that gives AI crawlers a curated, machine-readable map of your site plus a canonical description of your brand. Think of it as the AI-era equivalent of robots.txt. It is one of the cheapest and fastest generative-engine-optimization signals you can ship, and the build prompt in this guide generates it for you automatically, so your site speaks clearly to ChatGPT, Perplexity, and other answer engines from day one.
Do I need to know how to code to build and deploy the site?
No. Claude Code, or another AI coding agent, writes the entire project from the prompt in this guide, and Cloudflare Pages builds and deploys it automatically on every push. Your job is to fill in a few placeholders - your brand name, domain, and a one-line description - review what the agent produced, and click through the Cloudflare Pages setup. You need to be comfortable creating accounts and copying a few settings, but you do not need to write code yourself.
How do I know if any of this is working?
Run a free Brand Analyzer scan at brands.dataease.ai on your new domain right after you deploy. It scores your site across the 7-Signal AI Visibility Framework - Wikipedia, Wikidata, domain authority, schema, third-party citations, verified social, and llms.txt - in under 60 seconds with no signup, and gives you a day-one baseline to measure Parts 2 and 3 against.
Bottom line
The barrier to launching a brand that AI will actually cite was never the budget. It is sequence. Register one domain, put it on Cloudflare's free plan, own your code in a private GitHub repo, let Claude Code scaffold a site that ships schema, llms.txt, and clean answer-first structure on day one, then deploy it on Cloudflare Pages straight from that private repo. Do those three things in order and you have a real, citable foundation for about $25 a month - the on-site half of AI visibility, complete, before you have spent a dollar on marketing. Run a free Brand Analyzer scan to lock in your baseline, then come back for Part 2, where we make your new site findable and measurable.
How to cite this guide
DataEase AI. How to Launch a Startup Brand for Under $25 a Month: Part 1 - Initial Setup. DataEase AI Blog, May 30, 2026. https://blog.dataease.ai/launch-startup-brand-minimal-cost-part-1/. Methodology: the DataEase 7-Signal AI Visibility Framework, applied via Brand Analyzer (brands.dataease.ai). Related reading: Why Isn't My Brand Mentioned in ChatGPT?, What Is Brand Presence?, and Brand Identity on a Budget.
Coming up in this series
This is Part 1 of three. Two more land on the usual weekly cadence:
Part 2 - Get found and measured (next week). Setting up Google Search Console and Google Analytics 4 the right way - verifying your domain, submitting your sitemap, and wiring up the events that tell you whether anyone is arriving - followed by the full, free list of sites and directories to submit your brand to. These are the third-party citations AI answer engines actually read, mapped to the 7-Signal framework, and they stay at $0.
Part 3 - Earn authority and get cited (the week after). The capstone: a repeatable GEO/AEO content cadence built on question-first posts and comparison or "alternatives" pages, pitching the listicles AI cites, creating your Wikidata entity with sameAs wired across every profile, and compounding authority through podcasts, guest posts, original data, and the Wikipedia path. It is also where we move from one-off audits to ongoing monitoring with the DataEase AI Brand Intelligence platform, which tracks how your brand is described across ChatGPT, Claude, Perplexity, and Gemini over time - so you can watch your citation share climb against the baseline you captured in Part 1.